Vertical Rollerskating > How to build a vertical roller skate
The making of a Vertical Rollerskate
So you want to build your own vertical rollerskates. You have to, because
you can't buy them off the shelf. You are determined, because there aren't
very many vertical rollerskaters. You have to invest quite some time (and
probably money, depending on how much of the material you can get second hand)
to achieve your goal. There isn't a universal solution. Instead, I describe
my own views and experiences. You have been warned.
Requirements
A vertical rollerskate is substantially different from an ordinary rollerskate.
One way to put the difference is: everything is harder, another one: everything
is more robust. When doing ramp skating, you probably need much more control.
You also need more protection. These properties can be seen as a reason for
the above requirements: Hardness gives you control (the hardness of the wheels
gives you speed in the ramp) and robustness gives you protection (you don't
want to hurt your feet when you slam in the ramp).
Materials
Here is a concise list of the necessary materials. I will describe each item in
more detail later.
- Boots
- Base
- Trucks
- Wheels
- Bearings
- Sliders
- Nuts and Bolts (M5)
- Washers
Optionally you can attach stoppers and other things to your skates. But they
are not really necessary.
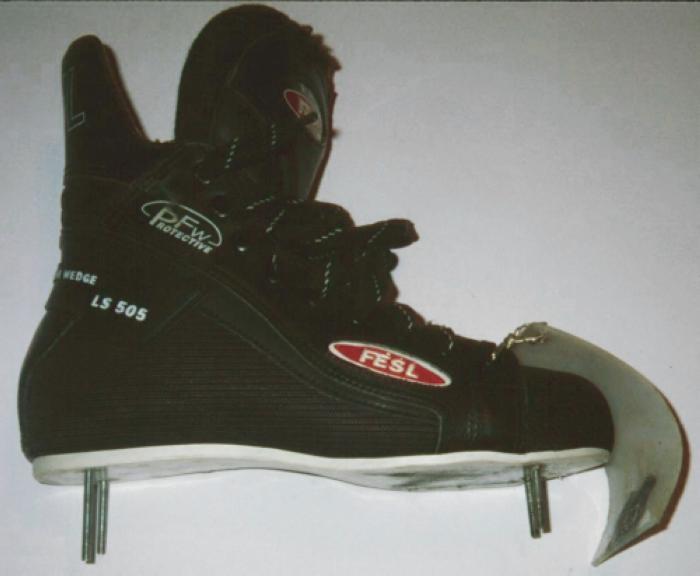
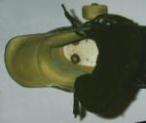
Boots
These are very important. They have a big influence on how much control you
have and they protect your valuable feet. You shouldn't use anything which
doesn't give you a comfortable fit, control and stability. You can try and
look for some used ones (I did this one time) or you can buy some new ones.
Be prepared to pay the equivalent sum of a very usable inline skate for a new
one. I recommend a leather boot like the ones used by serious ice hockey
players. They are made of very thick leather and fulfil our requirements.
Base
The Base acts as the chassis where the trucks and the boot are mounted
together. It could be called the "soul" of the skate. It has to be very stable
so it won't break when you do your liptricks or slam on you feet (which
hopefully won't happen too often!). I currently use an aluminium base which
is approximately 5 mm thick. The thinner one I used before broke. You can
also use something other very durable. Sawed off skies have been used
successfully by other skaters. In the stone age of vertical rollerskating
Tracker offerd a base specially made for vertical rollerskating. It was
made of a 4 mm thick wooden core coated on both sides with 1 mm thick
aluminium. In addition to its high stability it also was very light. You
probably won't find one of those gems any more.
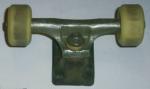
Trucks
I use some freestyle skateboard trucks from Gullwing. Probably any decent
freestyle skateboard truck will do. Freestyle truck are scarce but you can
buy them from freestyle skater Yoyo Schulz at yoyoskate.com. Alternatively you
have to settle down for some other skateboard trucks and shorten them to
your needs (I have also seen one rollerskater from Prague skating parallel
style with wide skateboard trucks. Crazy!).
Wheels
You can use rollerskate wheels or skateboard wheels. There are two things
to consider: hardness and size. Harder wheels are faster but also more
slippery. In my experience they should be harder than 97 A. The bigger the
wheels, the faster they are. 66 mm is nice, but you can also use smaller ones.
Bearings
Use high quality ones!
Sliders
You will want to use some hard, durable plastic for sliding. Skateboard
rails are quite useable. I have good experience with crow bars. I use some
wood to put them in the right distance from the base.
Nuts and Bolts
To bring all of the parts together, you need quite some bolts of different
length. I use two nuts per bolt: one ordinary nut and additionally one
self-locking nut. All bolts are countersunk screws.
Tools
- Drill
- Screwdriver
- Wrench
- Metal Saw
Preparation of the Parts
Washers

It's important to countersink the washers. They hold the bolts in the boot and
you don't want the heads of the bolts to stick into your feet, or do you?
Maybe you can get readily countersunk washers somewhere; I really don't
know.
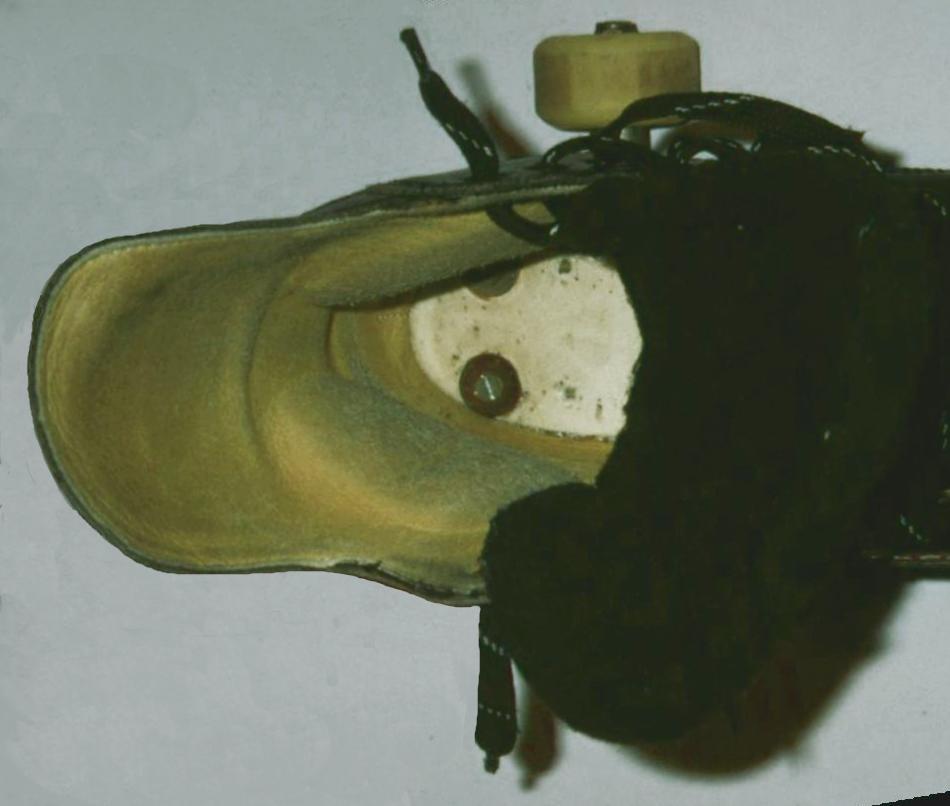
Boots

You need to drill four holes through the soles of your boots. Don't forget to
take out the padding. You don't want to put holes through it! The distance of
the holes from left to right corresponds to the distance of the holes in the
trucks. The position of the front holes results from where you put the front
truck which depends on whether you want to have stopper blocks. If you don't
want to have stopper blocks, you can move your front trucks more in front,
which results in a bigger distance between the axles. A bigger distance gives
you more stability (which I believe to be more important for vert skating) and
a smaller distance gives you a greater maneuverability.
You have to push four bolts from the inside of the boot through the holes you
drilled into the sole. The bolts are held in the boot using the countersunk
washers.
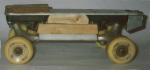
Base
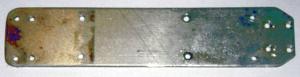
You have saw a base plate the size of your shoes. It's better not to keep
its shape rectangular but to take off the edges in front so that they don't
stick out from under the shoe. Then you have to drill 10 holes for the trucks
into the base plate. Six holes are for the back truck, four holes for the
front truck. The base plate shown in the image has an additional four holes for
the stopper block which are only neccessary if you want to mount a stopper
block. There are only two holes through which the front truck is screwed
directly to the base plate. These holes have to be countersunk, so that
the boots fits snugly to the base plate.
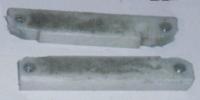
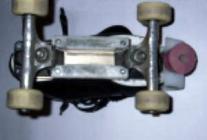
Rear truck
The rear truck will be screwed through the base to a small heel block (you can
use wood for the heel block). Therefore you don't have to countersink the
holes in the base plate for the rear truck. You rather have to countersink
the holes in the heel block. There are two important extra holes in the base
plate and in the heel block through which the shoe is mounted to the base. You
can't use the holes which are already in the truck but have to drill extra
holes. The truck has to be aligned with the heel so that the rear holes are
too far arear to be useably for the boot.
Sliders
If you use skateboard rails for the sliders like me, you can countersink
some self-locking nuts into them. There is a detailed page about
how to attach sliders to a roller skate.
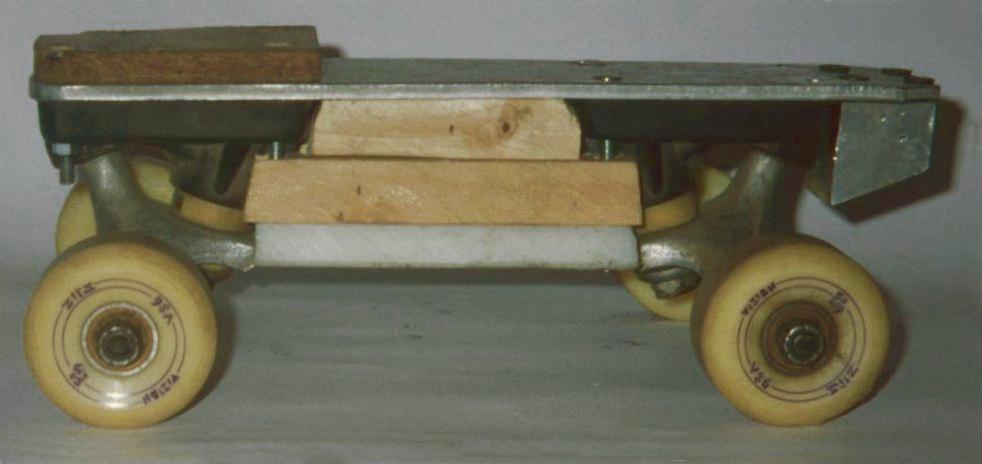
Assembly
First you have to assemble the chassis. You have to screw the trucks to the
base plate using bolts of suitable lengths. Don't forget to mount the heel
block together with the rear truck. The two front holes of the front truck
aren't screwed to the base plate, they are used for mounting the boot (as are
the extra holes in the rear truck). If you want to have a stopper block, you
have to mount this, too. The whole assemly should look something like the
picture.
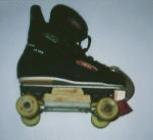
Now you can put the boot on the chassis and secure the bolts with some nuts. I
use additionally some self-locking nuts because I don't want the whole
assembly to come apart when I'm skating in the ramp.
Credits
This page was written by Bernhard Scheffold.
Thanks go to:
- Florian Rühle for my first aluminium base plate
- Phillip Bögle for producing my current base plate
- Tobias Kolleth for producing the stopper blocks
-
Sven Schuhmacher for image processing
- Tim Barwisch for lots of work on the skates
Comments? Questions? Suggestions?
Send Mail to: roller@adinfinitum.de
Back to Vertical Roller-Skating.
Last Update:
>